Da' SkrappaWagon
Da' DakkaTraka
I will try to tell you how I painted my trukk, trak, Nob, Spanner, and some of the Boyz.
Step 1
Start by carefully snipping out all the parts for your trukk and trak from their sprues, and clean off all mold lines, and fill any irregularities such as airbubbles. If you wish to do any battle damage, this is the time to do it, before the parts are assembled. As you can see from Figure 1.1, you can do battle damage by drilling bullet holes with a pin vice, and cutting chunks out of the plastic with a hobby knife, such as an X-Acto knife. You can also use a triangular file to do battle damage such as would be caused by a choppa. At this time, only glue the bed and the bed's front bulkhead to the chassis of the trukk. Do not glue any of the parts of the trak together at this time, as it will make it much easier to paint them if they are not assembled. Use a hobby knife and jeweler's files to clean up your metal figures and make sure you remove all mold lines and irregularities. Clean all parts with warm soapy water, and a toothbrush to remove all mold release agents before using any putty or doing any gluing. Check your figures for any pits or other irregularities and fill them with hobby putty and sand smooth.
Figure 1.1
Step 2
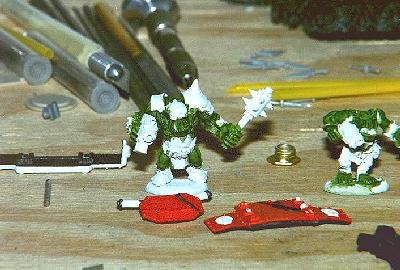
Assemble your Boyz, Nob, and Spanner(s) and fill any gaps with hobby putty. (I use Squadron green or white putty.) Make sure that all seams are filled and molded in and sanded smooth.
Step 3
Primer most parts of your trukk/trak/buggy with black primer. But primer any parts you intend to paint a bright colour with white primer. If there is a small area on the part that you have primered black that you wish to be a bright colour, first paint it white before trying to paint the bright colour. As you can see in Figure 3.1, I have primered the majority of the trukk with black primer, as this is the best base for an iron effect.
Figure 3.1

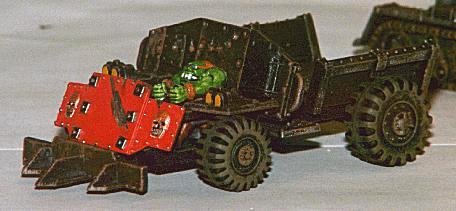
The vehicle should be first drybrushed all over with Iron, then drybrushed all over very lightly with Boltgun Metal, and the damaged areas painted with BoltGun Metal, then highlighted with Silver. After this, go back and drybrush all over with Rust. You can use Chestnut for Rust. You will want to add a little extra rust to the damaged areas. You can see the effect in Figure 3.2.
Figure 3.2
Step 4
All of your Ork figures should be primered white. Then paint the skin areas with a thinned-down medium green, allowing the high areas to be lighter than the recesses and shadowed area. Paint all the recessed and shadowed areas of the flesh with a very dark green. Now wash over this with a very thin wash that is halfway between your base green and your shadow colour. This is the unify the two colours. Next, blend a lighter shade than your base colour over the rasied areas, making sure to blend the areas between colours together. Now take an even lighter colour and paint it over a smaller area of the raised portions, once again blending the edges between colours. Now you can start adding a little bit of yellow to your green and blending highlights onto raised areas. Keep adding smaller and brighter highlights, blending each one with the one before. Now this may sound strange, but you should take a wash that is slightly darker than your original base colour (a very thin wash) and wash this over all of the skin areas. This will keep your different shades of colour from looking artificial. As always, make sure to add some matte medium to all washes to keep the pigments from separating. Only use as much of the wash in your brush as you need to coat the area and do not allow it to pool and leave water marks in your paint job. Paint in the eyes with a good strong red, and black out the mouth area. After the black is dry, paint the teeth white, leaving a black outline around each tooth and leave the base of the teeth black. Now paint the teeth Bleached Bone, blending it down to the black areas. Now highlight the teeth with a little white.
Figure 4.1
Step 5
It's now time to paint clothing, then armour on your figures, and things such as the front plates for your vehicles, etc. To paint the clothing, use the same procedure as you did for the skin, but in appropriate colours for the clothing. Paint straps, belts, etc. in a contrasting colour. After you have the base colours on the clothing and armour, highlight them as you did the skin but in the appropriate colours, always blending the lighter colours into the darker colours, and do not overdo it. You want a smooth transition from dark to light areas. If you overdo shadowing and/or highlighting, your figures will look cartoonish or toy-like. Now all that's left is to detail your figures and assemble and detail your vehicles.
Figure 5.1
Step 6
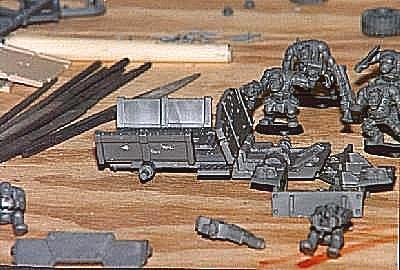
It is easier to weather and detail your vehicles if you do it beofre you assemble them. As you can see from figure 6.1, some areas would be inaccessible once the vehicle was assembled.
Figure 6.1
Step 7
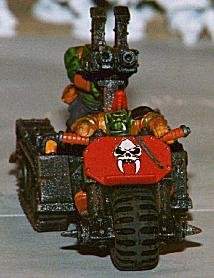
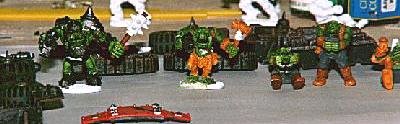
Add the final details to your figures. Here you will have to choose how you wish to paint them. The best I can do is give you examples that you can get ideas from. You can also get ideas by looking at the pictures in the colour section of Da Uvver Book in the GorkaMorka boxed set, and issues of White Dwarf magazine.
Figure 7.1

Step 8
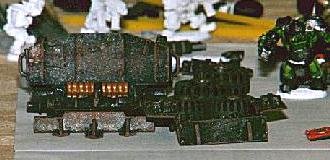
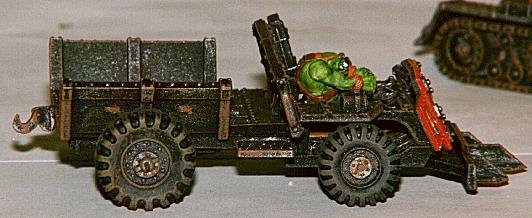
Now it's time to carefully finish assembling your vehicle. After you have them assembled, you can drybrush on earth colours to waether them, and to unify your paint job.
Figure 8.1
Step 9
You should always varnish your models. The way to do this is to spray a very, very thin coat of gloss cote (I use Krylon Crystal Clear, but nay good lacquer-based varnish will do). After this initial coat has dried, put on a heavier coat of gloss varnish, and let it dry thoroughly. Now spray over the gloss cote with dull cote to kill the shine and give a more realistic look to your models. Make sure you always use a lacquer-based varnish. Acryic Varnishes and matte medium will not protect your models.
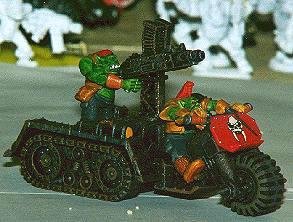
Some examples of finished models:
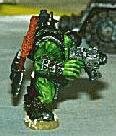
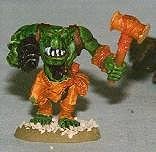
This article and all images are copyright (c) Thomas Setzer 1997.